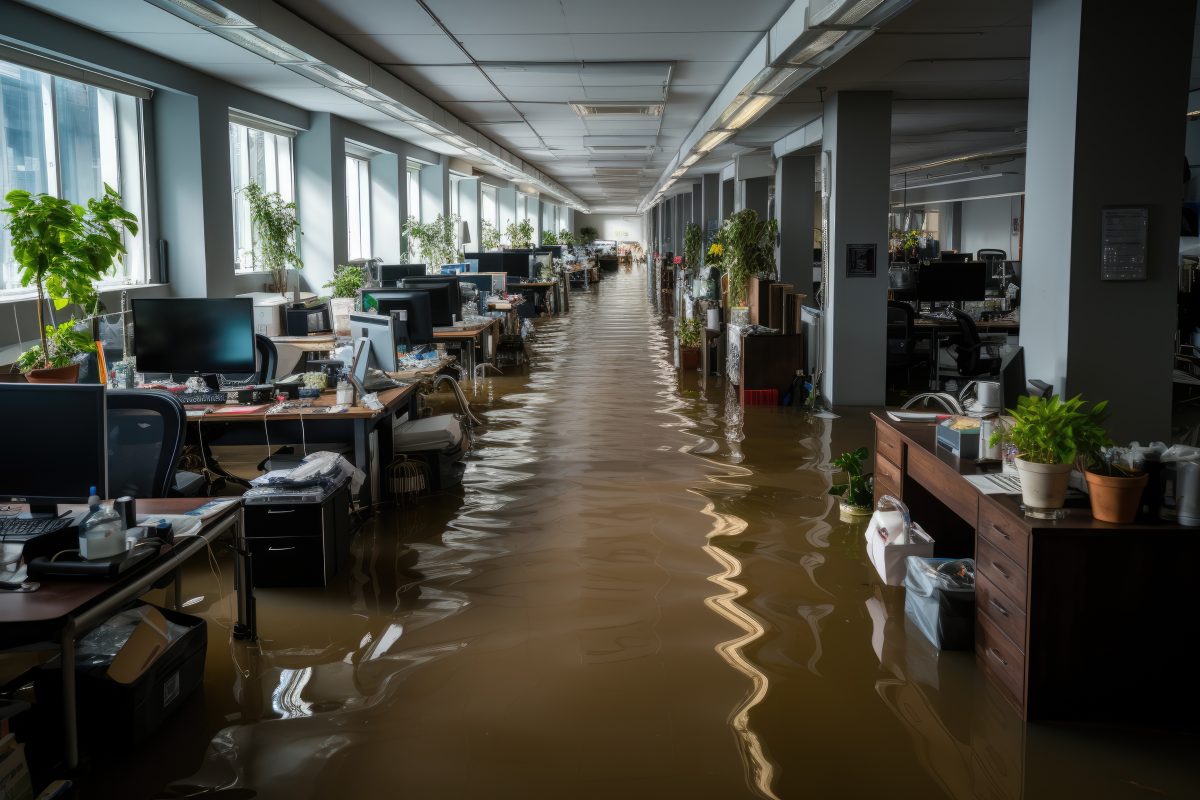
Has ankle-deep water invaded your home or business, leaving you feeling overwhelmed and unsure of what to do next? Don’t panic! In this step-by-step guide, we’ll walk you through the process of dealing with flooded floors, helping you regain control and restore your space to its former glory.
Whether it’s caused by a burst pipe, heavy rainfall, or a faulty appliance, standing water in your property can feel like a nightmare. But with the right approach, you can minimize the damage and get things back on track more quickly than you might think.
From assessing the situation and ensuring your safety, to removing the excess water and tackling the aftermath, we’ll cover every aspect of handling ankle-deep flooding. We’ll even share tips on drying out your space, preventing mold growth, and restoring your belongings.
Don’t let ankle-deep water dampen your spirits or cause long-term damage. Follow our expert advice, and you’ll be well on your way to a clean, dry, and comfortable space once again.
Stay tuned for our comprehensive guide to dealing with ankle-deep water in your home or business.
Safety precautions when dealing with flooded floors
When faced with ankle-deep water in your home or business, your safety should be your top priority. Before you start the cleanup process, make sure to take the following safety precautions:
1. Turn off the electricity: Water and electricity are a dangerous combination. Locate your electrical panel and switch off the power to the affected area. If you’re unsure how to do this, contact a professional electrician to ensure your safety.
2. Wear protective gear: Before stepping into the flooded area, put on rubber boots, gloves, and a face mask. This will protect you from potential hazards, such as sharp objects, contaminants, and mold spores.
3. Use proper lighting: Ensure the area is well-lit to avoid accidents or injuries. If the power is out, use battery-operated lights or flashlights. Avoid using candles or open flames, as they can pose a fire risk.
Remember, if the water level is too high or if you’re unsure about any aspect of the cleanup process, it’s best to seek professional help. Your safety should never be compromised.
Assessing the extent of the damage
Once you’ve taken the necessary safety precautions, it’s time to assess the extent of the damage caused by the ankle-deep water. This step is crucial in determining the appropriate course of action and understanding the scope of the cleanup process. Follow these steps to assess the damage:
1. Document the affected areas: Take pictures or videos of the flooded areas before you begin the cleanup process. This documentation will be useful for insurance claims and can serve as evidence of the damage.
2. Identify the source of the water: Determine the cause of the flooding, whether it’s a burst pipe, heavy rainfall, or a malfunctioning appliance. This will help prevent future incidents and inform your approach to the cleanup.
3. Check for structural damage: Inspect the walls, floors, and ceilings for any signs of structural damage. Look for cracks, warping, or sagging, as these could indicate underlying issues that need to be addressed.
By thoroughly assessing the extent of the damage, you’ll be able to make informed decisions about the cleanup process and ensure that no hidden issues are left unattended.

Removing the water from the flooded area
With the assessment complete, it’s time to start removing the ankle-deep water from your home or business. The following steps will guide you through the process:
1. Gather the necessary equipment: To effectively remove the water, you’ll need a wet/dry vacuum, a submersible pump, or a mop and buckets. Ensure that the equipment is in good working condition before you begin.
2. Start with the highest point: If the water has spread to multiple areas, begin removing it from the highest point and work your way down. This will prevent the water from flowing into already cleared areas.
3. Use the appropriate method: If you have a large amount of water, a submersible pump or wet/dry vacuum will be the most efficient option. For smaller areas, a mop and buckets can be used. Remember to empty the buckets away from the flooded area to prevent recontamination.
4. Dispose of the water properly: It’s important to dispose of the water in a safe and environmentally friendly manner. Avoid pouring it down the drain if it’s contaminated with sewage or chemicals. Check local regulations for proper disposal methods or consult with a professional.
Removing the water is a critical step in mitigating damage and preventing further issues such as mold growth and structural damage. Take your time and ensure that the area is thoroughly cleared before proceeding to the next step.
Drying out the affected area
Now that the excess water has been removed, it’s time to focus on drying out the affected area. Proper drying is essential to prevent mold and mildew growth, as well as to restore the space to its pre-flood condition. Follow these steps to effectively dry out the area:
1. Increase ventilation: Open windows and doors to promote air circulation. If possible, use fans or dehumidifiers to speed up the drying process. Avoid using central heating or air conditioning systems, as they can spread mold spores.
2. Remove wet materials: Take out any wet carpets, rugs, furniture, or other items that have been affected by the flooding. These items can hinder the drying process and may need specialized treatment.
3. Monitor humidity levels: Use a hygrometer to measure the humidity levels in the affected area. Ideally, the humidity should be below 50%. If it’s higher, continue the drying process until the desired level is reached.
4. Clean and disinfect: Once the area is dry, thoroughly clean and disinfect all surfaces to remove any remaining contaminants. Use a mild detergent or a mixture of water and bleach for this purpose. Wear gloves and a mask to protect yourself during the cleaning process.
Properly drying out the affected area is crucial for preventing mold growth and ensuring that your space is safe and habitable. Be patient and thorough in this step to achieve the best results.

Salvaging belongings and furniture
Unfortunately, some of your belongings and furniture may have been damaged by the ankle-deep water. However, not all hope is lost. With prompt action, some items can be salvaged. Here’s what you can do:
1. Separate salvageable and unsalvageable items: Sort through your belongings and furniture, separating those that can be salvaged from those that are beyond repair. Items that are made of non-porous materials and haven’t been submerged for too long have a higher chance of being saved.
2. Rinse and dry salvageable items: For items that can be salvaged, rinse them with clean water to remove any dirt or contaminants. Then, carefully dry them using towels or a gentle heat source, ensuring that they’re completely dry to prevent mold growth.
3. Consult professionals for specialized items: If you have valuable or sentimental items that have been damaged, consult with professionals in restoration services. They have the expertise and equipment to restore delicate or unique items.
Remember, the longer your belongings and furniture remain wet, the higher the chances of irreversible damage. Act quickly and salvage what you can to minimize losses.
Preventing mold and mildew growth
Mold and mildew can quickly become a problem in areas that have been affected by ankle-deep water. To prevent their growth and ensure a healthy environment, follow these preventive measures:
1. Maintain proper ventilation: Adequate airflow is crucial in preventing mold and mildew. Keep windows open, use fans or dehumidifiers, and avoid excessive moisture in the air.
2. Repair any leaks or water damage: Identify and fix any leaks or water damage in your property. Addressing the root cause of the flooding will prevent future incidents and minimize the risk of mold growth.
3. Use mold-resistant materials: When repairing or renovating the affected area, consider using mold-resistant materials. These materials are designed to inhibit mold growth and are a wise investment in flood-prone areas.
4. Monitor humidity levels: Regularly check the humidity levels in your home or business. If the levels rise above 50%, take immediate action to reduce moisture and prevent mold growth.
By taking proactive measures to prevent mold and mildew growth, you can ensure a healthier and safer environment for yourself and your loved ones.
Repairing and restoring the affected area
With the excess water removed, the area dried out, and your belongings salvaged, it’s time to focus on repairing and restoring the affected space. Depending on the extent of the damage, you may need to take the following steps:
1. Fix structural damage: If the flooding has caused structural damage, such as weakened walls or flooring, consult with a professional contractor to assess and repair the damage. They will have the expertise to ensure that your space is safe and structurally sound.
2. Replace damaged materials: Any materials that were irreversibly damaged, such as drywall or flooring, will need to be replaced. Choose materials that are resistant to water damage to prevent future issues.
3. Repaint or refinish surfaces: Once the repairs are complete, consider repainting or refinishing the affected surfaces. This will not only restore the appearance of the space but also provide an added layer of protection.
4. Reevaluate your insurance coverage: Take this opportunity to review your insurance policy and ensure that you have adequate coverage for future incidents. Consider adding flood insurance if you live in a high-risk area.
By taking the necessary steps to repair and restore the affected area, you can restore your space to its pre-flood condition and minimize the risk of future damage.
Tips for preventing future flooding incidents
While you can’t control natural disasters or unforeseen accidents, there are several steps you can take to minimize the risk of future flooding incidents in your home or business. Consider implementing the following measures:
1. Regularly maintain your property: Inspect your property regularly for any signs of water damage, leaks, or faulty appliances. Addressing these issues promptly can prevent larger problems down the line.
2. Install flood protection systems: Consider installing flood protection systems, such as sump pumps or flood barriers, in flood-prone areas of your property. These systems can help divert water away from your space and prevent flooding.
3. Elevate valuable items: If you live in a flood-prone area, elevate your valuable items, such as electronics or sentimental belongings, to higher levels. This will minimize their exposure to potential water damage.
4. Keep gutters and drains clear: Regularly clean and maintain your gutters and drains to ensure proper water flow. This will prevent water from pooling around your property and potentially causing flooding.
By being proactive and implementing preventive measures, you can significantly reduce the risk of future flooding incidents and protect your property.

Conclusion: Taking immediate action to minimize damage
Dealing with ankle-deep water in your home or business can be overwhelming, but with the right approach, you can minimize the damage and restore your space to its former glory. By following the step-by-step guide in this article, you’ll be equipped with the knowledge and tools to effectively handle flooded floors.
Remember to prioritize safety, assess the extent of the damage, remove the excess water, thoroughly dry out the affected area, salvage what you can to prevent mold growth, repair and restore the space, and take preventive measures for the future.
Taking immediate action and following this comprehensive guide will help you regain control and ensure that ankle-deep water doesn’t dampen your spirits or cause long-term damage. With determination and the right approach, you’ll soon have a clean, dry, and comfortable space once again.
Now, it’s time to roll up your sleeves and get to work. You’ve got this!

